There's a somewhat "hidden" feature of the QuickEditor that I haven't talked about much. If you give us a Google Translate API Key, we can enable Page Editor Translations for your QuickEditor license.
This will allow you and your users to translate everything on the page inside of your GHL Page Editor with one click.
This is great for if you have an English funnel template that you want to convert to another language to either give your users or start as a starting template for yourself.
Generate Google Translate API Key
Setting up API keys for Google Translate
This step-by-step tutorial will guide you through generating a Google Translate API Key.
1. Create a New Project
2. Go to API Services and enable Google Cloud Translation API
3. Create a new API key
4. Restrict API to particular website
5. Restrict usage to control costs – Important!
6. Copy API key
7. Send us your API key in a support ticket and we will add it to your QuickEditor License
Watch this short video for a quick tutorial:
To obtain a Google Translate API Key, follow these requirements:
You must sign up for a Google Cloud Console account
Credit card information is required during the registration process
Translation services are free within these limitations:
Up to 500,000 characters can be translated per month
Must stay within free tier limits
Your credit card will not be charged unless you:
Explicitly upgrade to a paid plan
Choose to move beyond the free tier limits
Important note: The free tier service allows for substantial translation usage without any costs, provided you remain within the specified character limit per month.
More information is available at: https://cloud.google.com/translate/.
To create your application’s API key simply follow the steps below:
1. Create a New Project in Google Cloud Console:
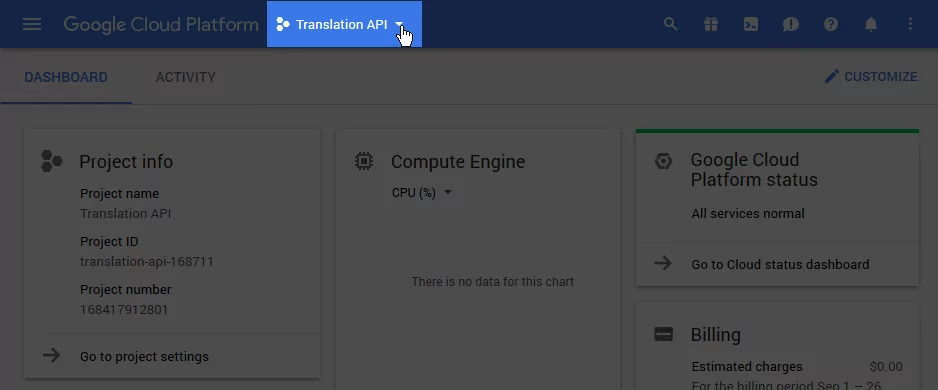
Navigate to the Cloud Platform Console (console.cloud.google.com)
Look for the top navigation bar
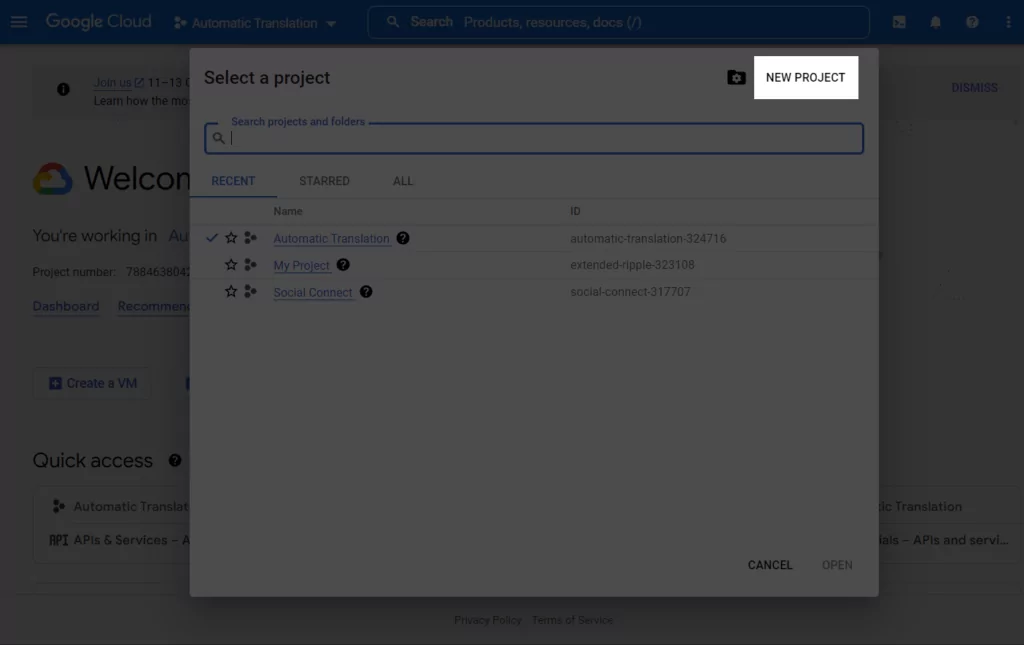
Locate and click the downward-pointing arrow (▼)
In the pop-up window that appears, click the "New Project" button
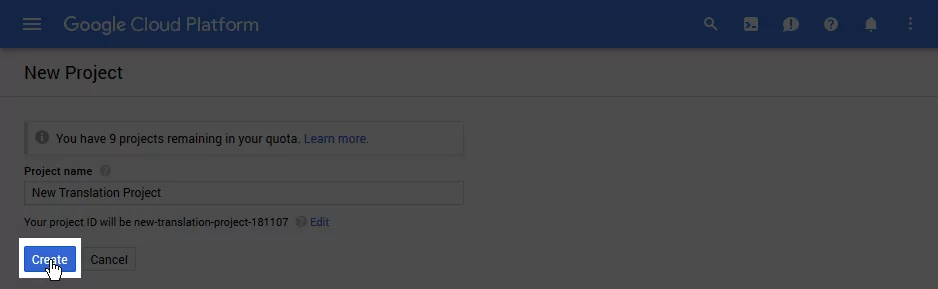
Enter a descriptive name for your project and select the "Create" button
2. Enable Google Cloud Translation API
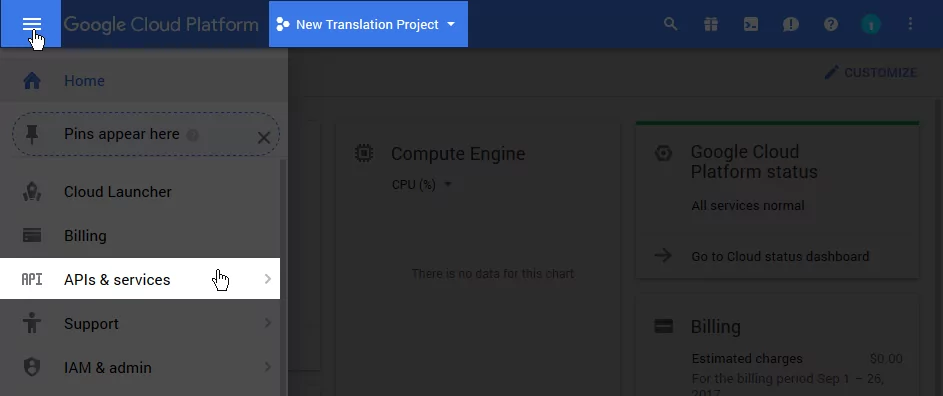
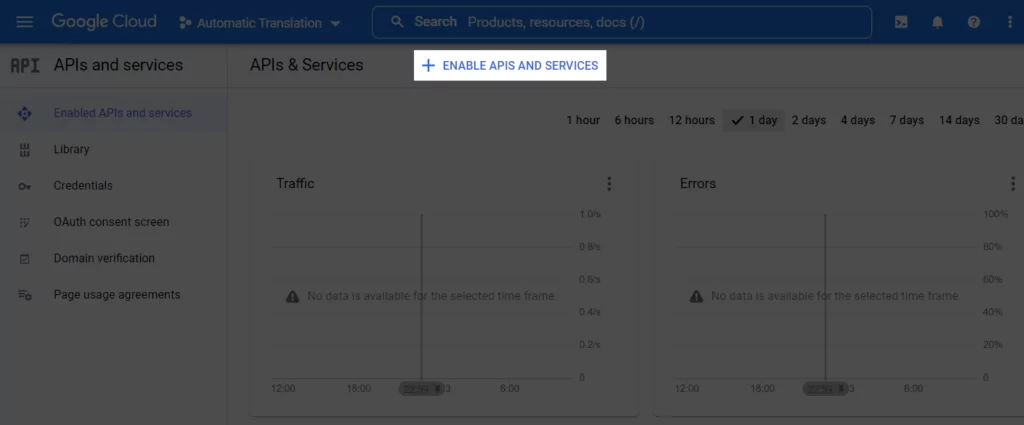
From your project dashboard, locate and click the three-line menu (☰) on the left side, then navigate to "API & Services" in the dropdown menu.
Click the "+ Enable APIs and Services" button at the top of your dashboard to access the API library and activate the Google Translate API features.
In the API Library window, use the search bar to look up "Cloud Translation API" to locate the translation service.
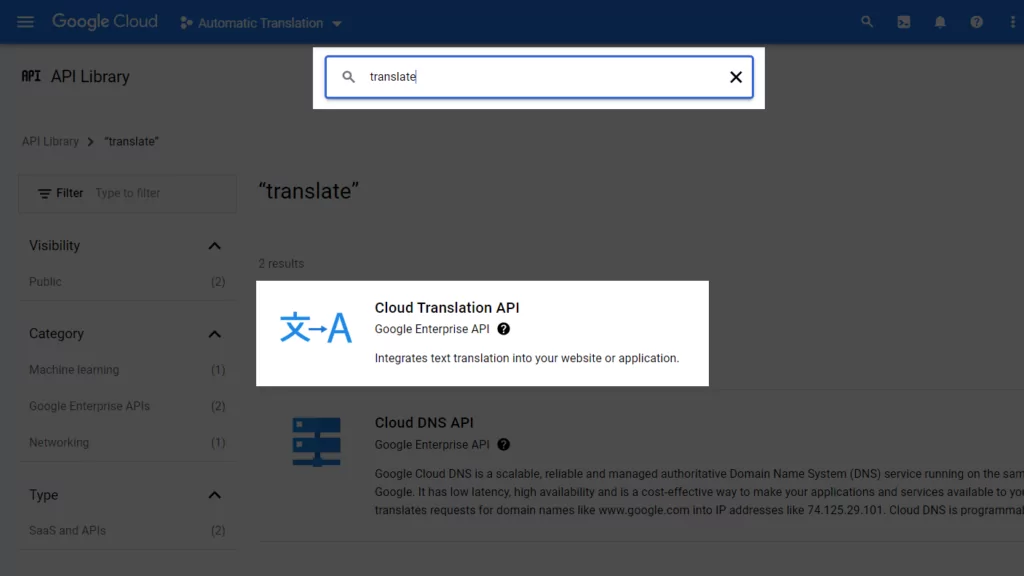
Find the Cloud Translation API in the results and click the "Enable" button to activate it for your project.
![]()
3. Create a new Google API key
From the left sidebar, select the "Credentials" tab, then click "Create Credentials" at the top. Choose "API Key" from the dropdown menu that appears.
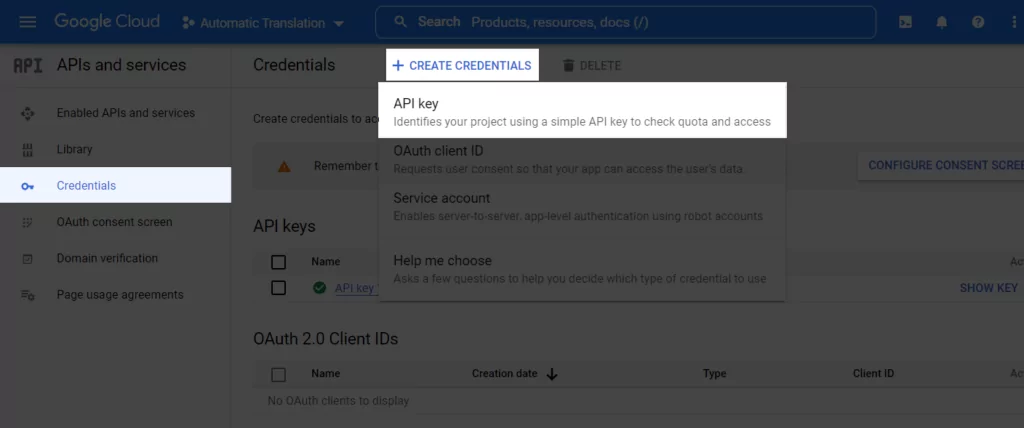
A new API key will be generated automatically for your project.
4. Restrict your API Key
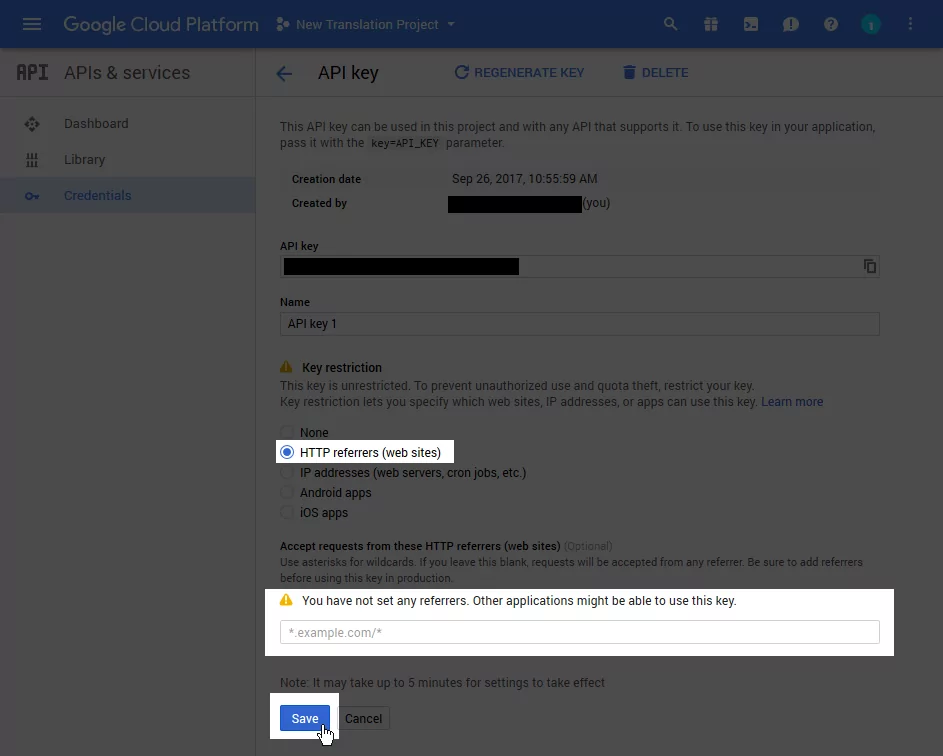
5. Restrict usage of translation API
In order to have control over the cost of Google Translate API, it is highly recommended to set quotas to limit usage.
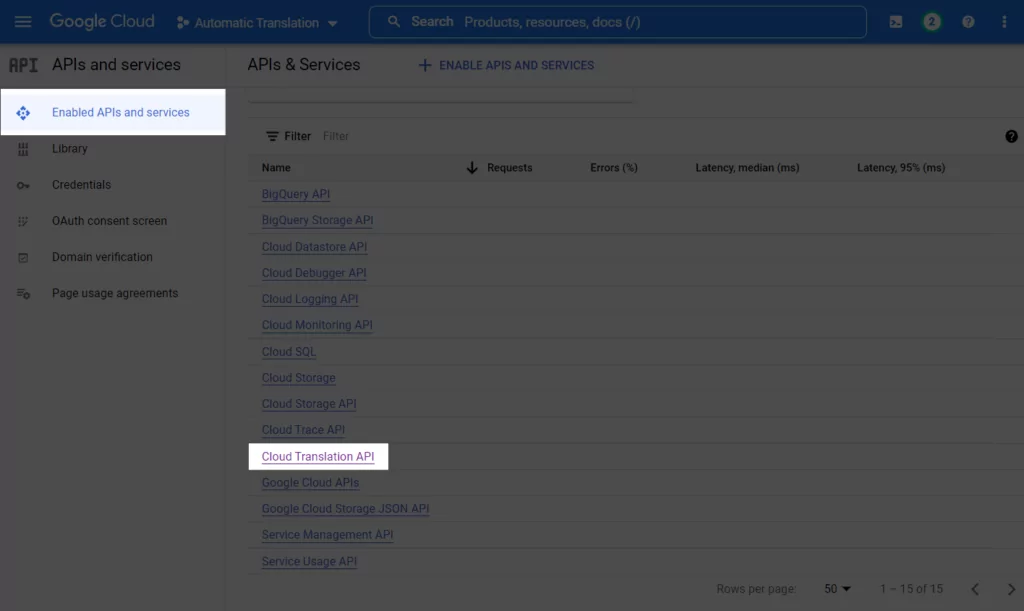
From the same APIs and services screen, go to Enabled APIs and services, scroll down on the page, and find the Cloud Translation API.
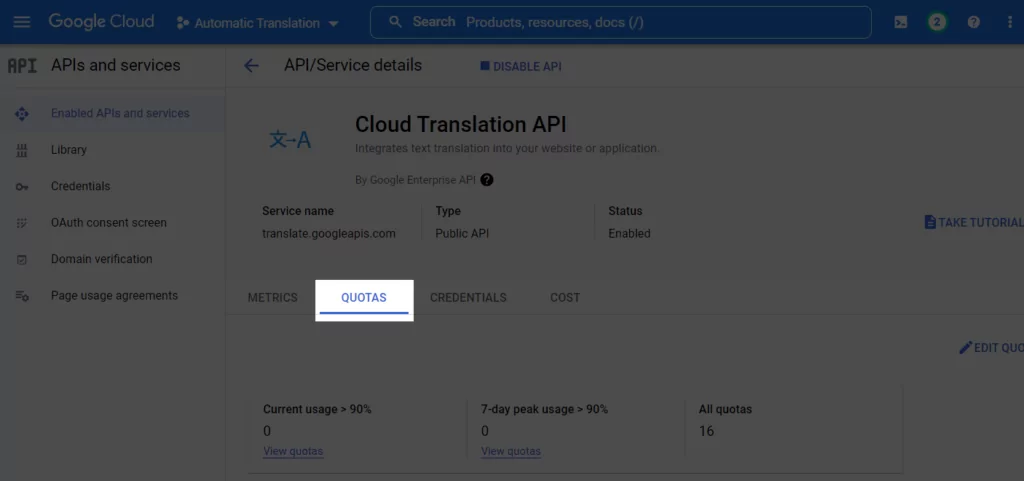
Click it and then navigate to the Quotas tab.
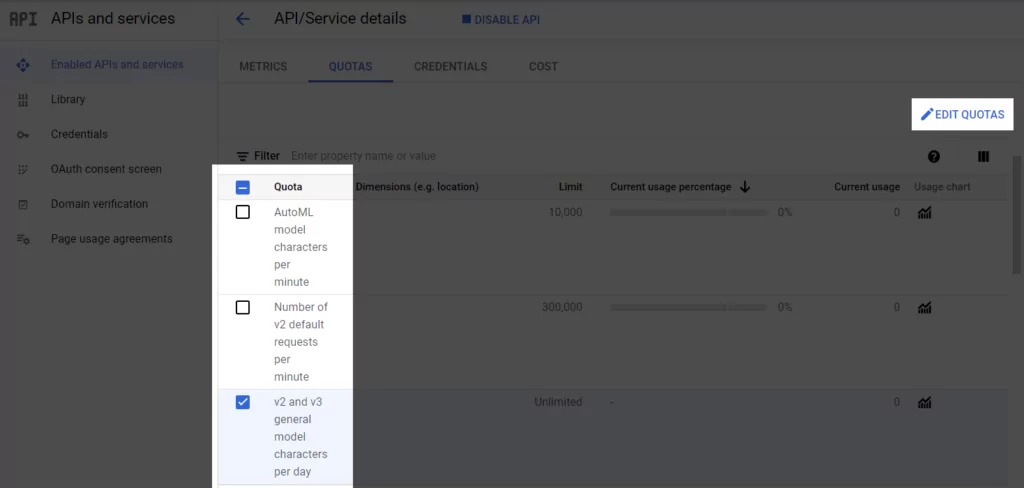
From here, you’ll be able to view all your quotas, select the ones you want to modify, and then edit them.
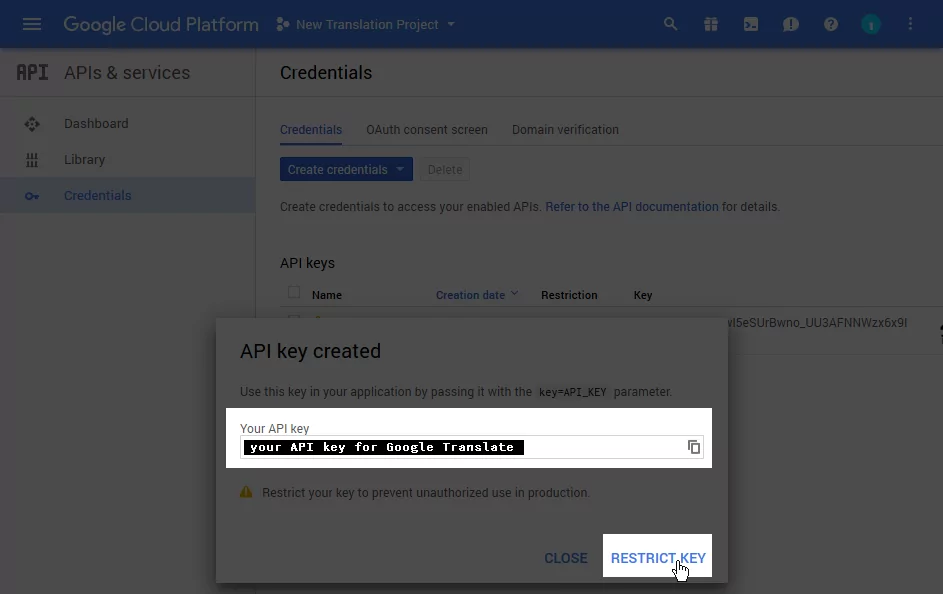
6. Copy your API Key and send it in a support ticket.
Go back to the Credentials tab and click the Show key button next to your newly created API key.
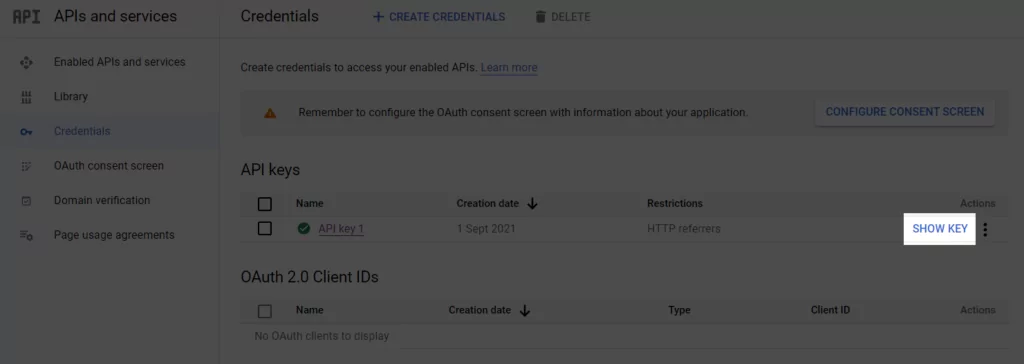
A new pop-up will appear to display your API key. Copy it from here.